

How to Restore Tea Cart Wheels with New Rubber Tires
Restoring tea cart wheels and rubber tires might seem like a challenging project, but I show you step-by-step how to do it. Furniture restoration requires specific knowledge and that's why I share videos on YouTube - to give you the knowledge to be successful in your projects.
The first step to resorting the old tea cart wheels is to disassemble the tea cart. This tea cart needs to be reglued, but this step also makes it easier to work on the individual parts. Once everything is apart, I start working on the wooden wheel.
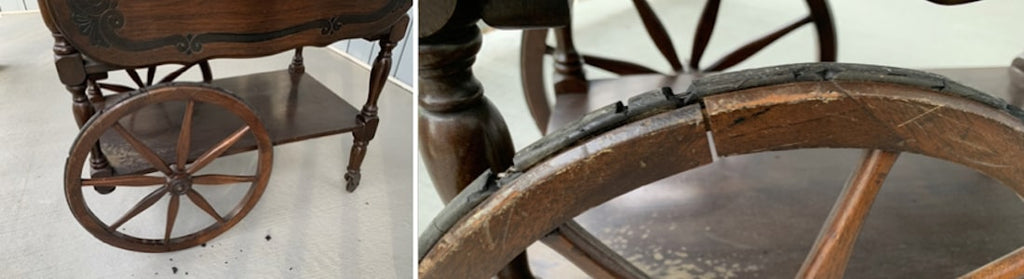
The old rubber needs to be removed. On these tires, there's a wire running through the middle. I cut back some of the brittle tire to expose an area to cut the wire with side cutters. With the tire off, I can inspect the wooden wheel closely to understand if any repairs are needed.

I begin by labelling the parts using masking tape so I'm confident how each piece goes back together again. Then I take a spreader clamp and begin separating the parts. There is a loose spline joint and some spoke that need reglueing.
I reglue the parts back together with hide glue (only use hide glue when repairing joints in antiques as it can be unglued in the future if something gets damaged). I spread glue on the mortises and tenons to ensure there's enough glue and I reassemble the wheel.
Clamping a wheel is tricky so I use a rubber band around the wheel and tie it tight enough to provide even tension around the wheel. There was one part that wasn't aligning so I added a clamp to push it back in place. I set this aside for the glue to dry and worked on the other wheel.

Next is the front caster wheels. The rubber is rock hard and it fell apart. Replacing the rubber is a little tricky on this type of wheel. I use 3/8" rubber and wrap it around the wheel to mark the length I need (for rubber supplies, see https://woodenitbenice.ca/collections/all/rubber ). Then I cut it off and wrap it around the wheel to see how it fits. I prefer to cut the ends on a slight angle to make the joints tighter. Once I'm happy with the fit, I apply CA glue to the end and join the two ends together. Make sure you wear gloves as CA glue can stick you skin together. I then use 0000 steel wool to remove any excess CA glue.
With the caster wheels done, I then move on to installing the new rubber on the large wooden wheels. This process is easier on these wheels. I measure the length, cut the rubber straight and test fit it on the wheel. Once I'm happy with the length, I then glue the two ends together. On a large wheel like this, the rubber can be glued together while not on the wheel as it can be stretched on afterwards. I set this aside and turn my attention to touching up the stain on the wheels.
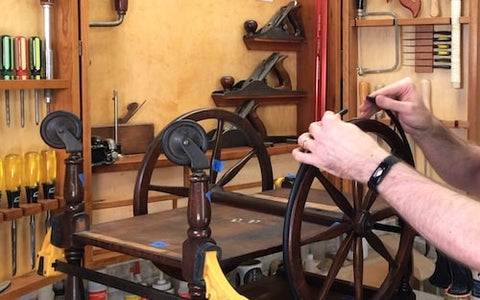
There are little marks on the stain so I touch them up with a stain marker. It's a simple process of running the stain marker over the defect and then wiping it with a cloth. The tricky part is finding the right color of stain to use... that's something that's easier with practice. With the wooden wheels looking good I then clean up the rubber glue joints with superfine steel wool and stretch them on to the wheels.
I hope you found this a helpful resource. If you have questions, feel free to add a comment in the YouTube video.
- Scott